Introduction
This time we’ll go in English, because I used many English blogs, forums and docs to learn much things about Arduino. This article contains Arduino sketches and Python code to analyse data gathered by the Arduino and send out via serial port to your computer. You may find some interesting methods and hints to get your 433 MHz device or even washing machine connected to the Arduino. You properly be able to communicate with it. This is a fun project, because reverse engineering is fun.
I was playing with my Arduino and some 433 MHz devices. I tried out many libraries in order to communicate with several devices. My wireless switches worked mostly out of the box. It was really funny to switch on and of the lights in my living room. But then i remembered a old long forgotten problem i noticed. My remote temperature sensor does run out of batteries very fast. After placing fresh batteries in the device it will run some weeks. So, there is the plan. As my family is used to look on the weather station to get the latest outside temperature, I need to get the temperature there without wasting to many batteries.
There is absolutely no guarantee that this will work for you and there is especially no guarantee that this will not harm any device you are trying to communicate with. Keep this in mind. You are on your own :)
The Arduino
The Arduino is an Atmel based prototype computer. They are cheap and come in many variants to you. You can properbly buy one at your local hardware store.
ARDUINO IS AN OPEN-SOURCE ELECTRONICS PROTOTYPING PLATFORM BASED ON FLEXIBLE, EASY-TO-USE HARDWARE AND SOFTWARE. IT’S INTENDED FOR ARTISTS, DESIGNERS, HOBBYISTS AND ANYONE INTERESTED IN CREATING INTERACTIVE OBJECTS OR ENVIRONMENTS.
The 433 MHz thingy
Perhaps you also noticed, that you have many goods which communicate via 433 MHz. You might use receivers to wirelessly switch on lights or devices. You might use an external temperature measuring device.
All of these devices communicate over 433 MHz channel which can transmit about 2400 bits/second.
In Region 1 (mostly the US) the frequency is at 915 MHz
There are many small boards you can order to get into this world of flowing data. I first bought an board called RFM12-433. It is cheap but hard to handle, as it is designed to hook onto another board. But i managed it.

But after the work was done, i figured out that the RF12 is not the best board to use thins like wireless power switches and temperature sensors. This is because these chips encapsulate the signal in a special und specific way. They are great to communicate between multiple Arduinos, but for my approach they failed.
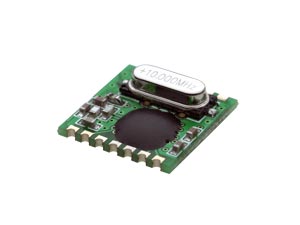
I tried to find another cheap solution for my problem and i found the XD-RF-5V. This board is more primitive, but this enables a lot more fun with this part. Because you can use the Arduino to emulate the needed controller for almost every protocol spoken out there.
There are many more of them out there, but others aren’t so cheap :-D
My work is now based in the XD-RF-5V.
Plug’n’play

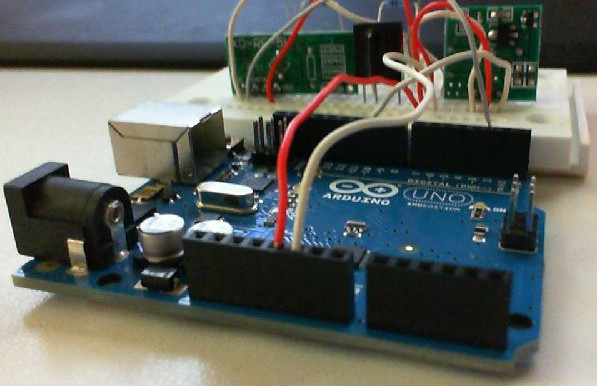
The XD-RF-5V has 4 Pins. Their purpose is: VCC, DATA, DATA and Ground. Power the thing up with 5V and connect one of the data pins to pin 2 of your Arduino.
Libraries to use
You can use libraries for the most of these devices. Thank god the Internet is still running ;). I tried out the following ones:
- rc-switch to control wireless switches
- VirtualWire to send and receive data from these devices. This library has a more general approach.
- 433 MHz for Arduino to control wireless switches and mangle data from wireless sensors
- JeeLib to control the RF12 and some other things.
Where is the lib for my device
When you are asking you this question, you properly bought a device which did not spread widely. I did this by buying an clock with integrated temperature sensor with an external sensor at Lidl. So – there we are. We have no knowledge about the protocol and other things we will need sooner or later to implement our own receiver for this device.
Lidl offers an service webpage where you can find docs for products they sold. So I tried to get the original documentation for this peace of hardware. But they have already forgotten that they sold this device.
Without knowing who build this, you have no chance to guess which protocol might be used for this. The conclusion for this is, that there is no library for this device.
How to implement a primitive logic analyser
After my research for a library failed completely I had to search for a different way to handle my remote temperature sensor. I found a nice thread in a forum, which pointed out that i have to figure out some basics of the protocol spoken.
First thing to find out is what is the length of an impulse send out from the remote temperature sensor. Therefor you have to upload a little sketch to your Arduino.
Impulse length detector sketch
void setup() {
  Serial.begin(115200);
  pinMode(2, INPUT);
}

void loop() {
  long LowVal=pulseIn(2,LOW);
  Serial.println(LowVal);
}
This sketch constantly writes out all detected pulse lengths to the serial port of the Arduino. The author of this post collected them and found the relevant sequences. This was done manually.
The problem with the manual approach is that you have to to read through 10000 to 50000 lines of numbers to find the correct sequence. Here is an example for the output.
Numbers and more numbers
6319
586
1430
108
1082
1528
1188
783
3073
...
1
2
3
4
5
6
7
8
9
10
6319
586
1430
108
1082
1528
1188
783
3073
...
After you started the sketch on the Arduino you get this output to the serial console. You can copy it by unplugging the Arduino which stops the output. But what if we want to sniff even more traffic. Perhaps to get signals from other remote temperature sensors of your neighborhood. Then you need this little python method.
Python reads the Arduino output
import serial

def receive(fn):
    f=open(fn,'w')
    ser = serial.Serial(5,115200)
    while True:
        try:
            line = ser.readline()
            try:
                value=int(line)
            except:
                continue
            f.write('{0}\n'.format(value))
        except KeyboardInterrupt:
            break
    ser.close()
    f.close()

if __name__ == '__main__':
    receive('433.log')
You can imagine that this is a tough job to find a sequence in such a huge amount of data and you will need some kind of Rainman to do this. You must also keep in mind that these numbers are not reliable. You cannot search for a specific sequence, because it will not repeat exactly. This is caused by corruption of the signal or other influences while generating these number with the Arduino.
Because of all this, here is a python script which does the job.
Python method to analyse the numbers
def analyse(output_list, start_pos, stop_pos, sequence_length_min, sequence_length_max, fault_tolerance, garbage_level):
    if stop_pos == -1:
        stop_pos=len(output_list)

    def equals_with_tolerance(p1, p2):
        if fault_tolerance < 1:
            width=output_list[p1]*fault_tolerance
        else:
            width=fault_tolerance
        return  output_list[p2] > output_list[p1]-width and \
                output_list[p2] < output_list[p1]+width

    positions=[]
    try:
        for first_value in range(start_pos, stop_pos):
            for second_value in range(start_pos, stop_pos):
                if first_value == second_value: continue
                if output_list[first_value] < garbage_level: continue
                if output_list[second_value] < garbage_level: continue
                try:
                    last_found=positions[-1]
                except:
                    last_found=None
                if last_found is not None and first_value <= last_found[0]+last_found[2]-1:
                    continue
                result = False
                for codelen in range(0, sequence_length_max):
                    if first_value + codelen >= len(output_list): break
                    if second_value + codelen >= len(output_list): break
                    nresult=equals_with_tolerance(first_value+codelen, second_value+codelen)
                    if nresult is False:
                        codelen-=1
                        if codelen >= sequence_length_min:
                            result=True
                        break
                if result:
                    positions.append((first_value, second_value, codelen))

#                sys.stdout.write('\r{0}/{1} => {2}@{3}               '.format(first_value, len(output_list), last_found, len(positions)))
#                sys.stdout.flush()
    except KeyboardInterrupt:
        print
    return positions

if __name__ == '__main__':
    analyse(open('433.log').readlines(),0,-1,6,12,25,100)
You may have to adapt these settings. The call of this method is very simple and it takes about 5 minutes on a modern computer to complete. You can use threads to increase the performance, but this wasn’t needed for my first try to do this.
The method and its arguments: analyse(
- list of numbers
- start position
- stop position
- minimal sequence length (mostly about 6)
- maximal sequence length (is currently ignored)
- fault tolerance (how much can the values differ from each other and being handles as they match exactly)
- the minimum pulse length we want to believe in(mostly 100µs is a great value for this)
)
The return value of this method is a list containing tuples of first position, second position and code length found in the list of numbers.
Output of the python analyser
[
  (1234,3215,7),
  (2456,5615,7),
  (3645,7895,60),
  (6345,8670,42),
  ...
]
This is also hard to read, so let’s write another method to get this more or less human readable.
Print out the position list
def print_positions(output_list, positions):
    for p1, p2, codelen in positions:
        print p1,p2,codelen
        print "="*40

        for i in range(0, codelen+1):
            print output_list[p1+i],
        print
        for i in range(0, codelen+1):
            print output_list[p2+i],
        print

        print "*"*40
And this result can be used to go even further and implement a real parser for this signal sequence.
Human readable output
0 23 17
========================================
295 713 99639 14250 629 16 1414 2417 384 7293 858 250 262 1116 562 11745 644 5441
295 713 99639 14250 629 16 1414 2417 384 7293 858 250 262 1116 562 11745 644 5441
****************************************
1361 6179 172
========================================
288 293 295 292 295 301 304 7585 2123 2124 2125 2125 308 310 2123 310 313 2132 2132 2132 2133 2133 2128 2135 2136 2136 318 318 2137 2137 2131 2137 319 314 2140 321 321 2143 2141 323 318 2141 323 318 2145 2146 318 321 2145 2148 329 329 2146 323 330 1905 326 52990 317 309 319 319 319 314 316 7597 2140 2140 2140 2139 314 322 2143 317 319 2144 2145 2143 2144 2144 2145 2137 2144 2144 319 326 2148 2146 2145 2146 326 327 2148 323 330 2149 2143 331 331 2152 333 333 2152 2152 331 334 2148 2153 335 329 2154 334 337 1913 337 52987 318 319 321 317 322 323 325 7608 2136 2143 2141 2144 323 325 2145 327 326 2141 2146 2146 2145 2145 2146 2146 2146 2146 327 322 2148 2149 2143 2148 327 325 2152 331 334 2152 2149 325 326 2152 335 330 2154 2154 330 335 2156 2149 337 338 2156 333 339 1913 337
275 287 292 295 292 300 301 7582 2115 2124 2124 2118 305 308 2131 310 310 2132 2132 2132 2127 2133 2135 2135 2136 2136 317 319 2139 2137 2141 2140 322 325 2137 323 326 2145 2145 327 323 2146 329 331 2144 2148 330 326 2149 2150 325 333 2153 327 326 1910 330 52994 316 318 312 321 319 323 317 7601 2141 2143 2141 2143 318 321 2144 327 321 2148 2148 2148 2146 2148 2149 2149 2148 2149 325 326 2149 2150 2150 2152 327 333 2154 326 329 2153 2153 335 337 2154 330 337 2154 2150 337 338 2157 2157 339 338 2157 340 340 1921 340 52995 316 317 322 323 317 325 325 7608 2145 2145 2145 2146 329 327 2149 329 329 2149 2152 2150 2144 2150 2150 2149 2150 2148 331 333 2146 2153 2152 2152 333 335 2156 334 338 2148 2156 338 331 2156 335 339 2158 2157 337 334 2160 2157 331 340 2160 333 335 1917 335
****************************************
...
This result isn’t final, but prefiltered. This means you have to find the correct values in here. But after looking on this data, you will find your sequence soon.
The sequence
52994 316 318 312 321 319 323 317 7601 2141 2143 2141 2143 318 321 2144
327 321 2148 2148 2148 2146 2148 2149 2149 2148 2149 325 326 2149 2150
2150 2152 327 333 2154 326 329 2153 2153 335 337 2154 330 337 2154 2150
337 338 2157 2157 339 338 2157 340 340 1921 340
As you see, the sequence starts with a long impulse, followed by six short ones. Then we have got a quite long impulse. After these the data starts. You can see two kinds of impulses, representing digital data(zeros and ones). This is the time to guess, which impulse length represents what.
Sequence fine tuning
void setup() {
  Serial.begin(115200);
  Serial.println("go!");
  pinMode(2, INPUT);
}

void loop() {
  long LowVal=pulseIn(2,LOW);
  if (LowVal > 50000) {
    Serial.println("3");
  } else if (LowVal > 6000 && LowVal < 8000) {
    Serial.println("2");
  } else if (LowVal > 1500 && LowVal < 2500) {
    Serial.println("1");
  } else if (LowVal > 100 && LowVal < 500) {
    Serial.println("0");
  }
}
This generates a long list of numbers. You should tune it until you only get new output, when pressing the reset button at the remote temperature sensor.
Sir, we found a sequence
With this sequence you find in your data, you are able to write your own sketch for your remote temperature sensor. For mine the following sketch worked out well.
Sketch to receive Lidl remote temperature sensor data
boolean start = false;
boolean data = false;
boolean debug = false;

long start_seq[9];
long data_seq[45];

int readcount = 0;
int pos = 0;

void setup() {
  Serial.begin(115200);
  Serial.println("go!");
  pinMode(2, INPUT);
}

void loop() {
  int i=0;
  long LowVal=pulseIn(2,LOW);

  if ( LowVal <= 200 ) return;

  if ( LowVal > 30000) {
    start_seq[0]=3;
    start=true;
    readcount=8;
    pos=0;
    if (debug) Serial.println("Start bit found");
    return;
  }

  if (readcount > 0) {
    readcount--;
    pos++;
  }

  if ( start ) {
    if ( LowVal < 500)
      start_seq[pos]=1;
    else if ( LowVal > 1000 && LowVal < 3000 )
      start_seq[pos]=0;
    else if ( LowVal > 7250 && LowVal < 7750 )
      start_seq[pos]=2;
    else {
      start_seq[pos]=9;
      readcount=0;
    }
  } else if (data ) {
    if ( LowVal < 500)
      data_seq[pos]=1;
    else if ( LowVal > 1000 && LowVal < 3000 )
      data_seq[pos]=0;
    else if ( LowVal >= 500 && LowVal <= 1000 )
      data_seq[pos]=5;
    else if ( LowVal >= 3000 && LowVal < 5000 )
      data_seq[pos]=6;
    else if ( LowVal >= 5000 && LowVal < 7500 )
      data_seq[pos]=7;
    else if ( LowVal >= 7500 && LowVal < 10000 )
      data_seq[pos]=8;
    else
      data_seq[pos]=9;
  }

  if ( start && start_seq[0] == 3 && start_seq[1] == 0 && start_seq[2] == 0 && start_seq[3] == 0 && start_seq[4] == 0 && start_seq[5] == 0 && start_seq[6] == 0 && start_seq[7] == 0 && start_seq[8] == 2 )  {
    if (debug) Serial.println("Start seq found");
    start=false;
    for (i=0; i<9; i++) {
      start_seq[i]=0;
    }
    data=true;
    readcount=45;
    pos=-1;
  } else if (start && readcount <= 0) {
    if (debug) Serial.println("Start seq not found");
    start=false;
    for (i=0; i<9; i++) {
      start_seq[i]=0;
    }
  }

  if (data && readcount <= 0) {
    for (i=0; i<45; i++) {
      Serial.print(data_seq[i]);
    }
    Serial.println();
    data=false;
  }
}
Now we have sequences of bits which must be interpreted. For this we need the original weather station in order to have the sequence translated.
Now you can watch the data transmitted from the remote temperature sensor. But starring at a weather station is not as much fun as it seems. That’s why we can use a webcam to make images...
Read more when the story continues :)
 muhpages VII